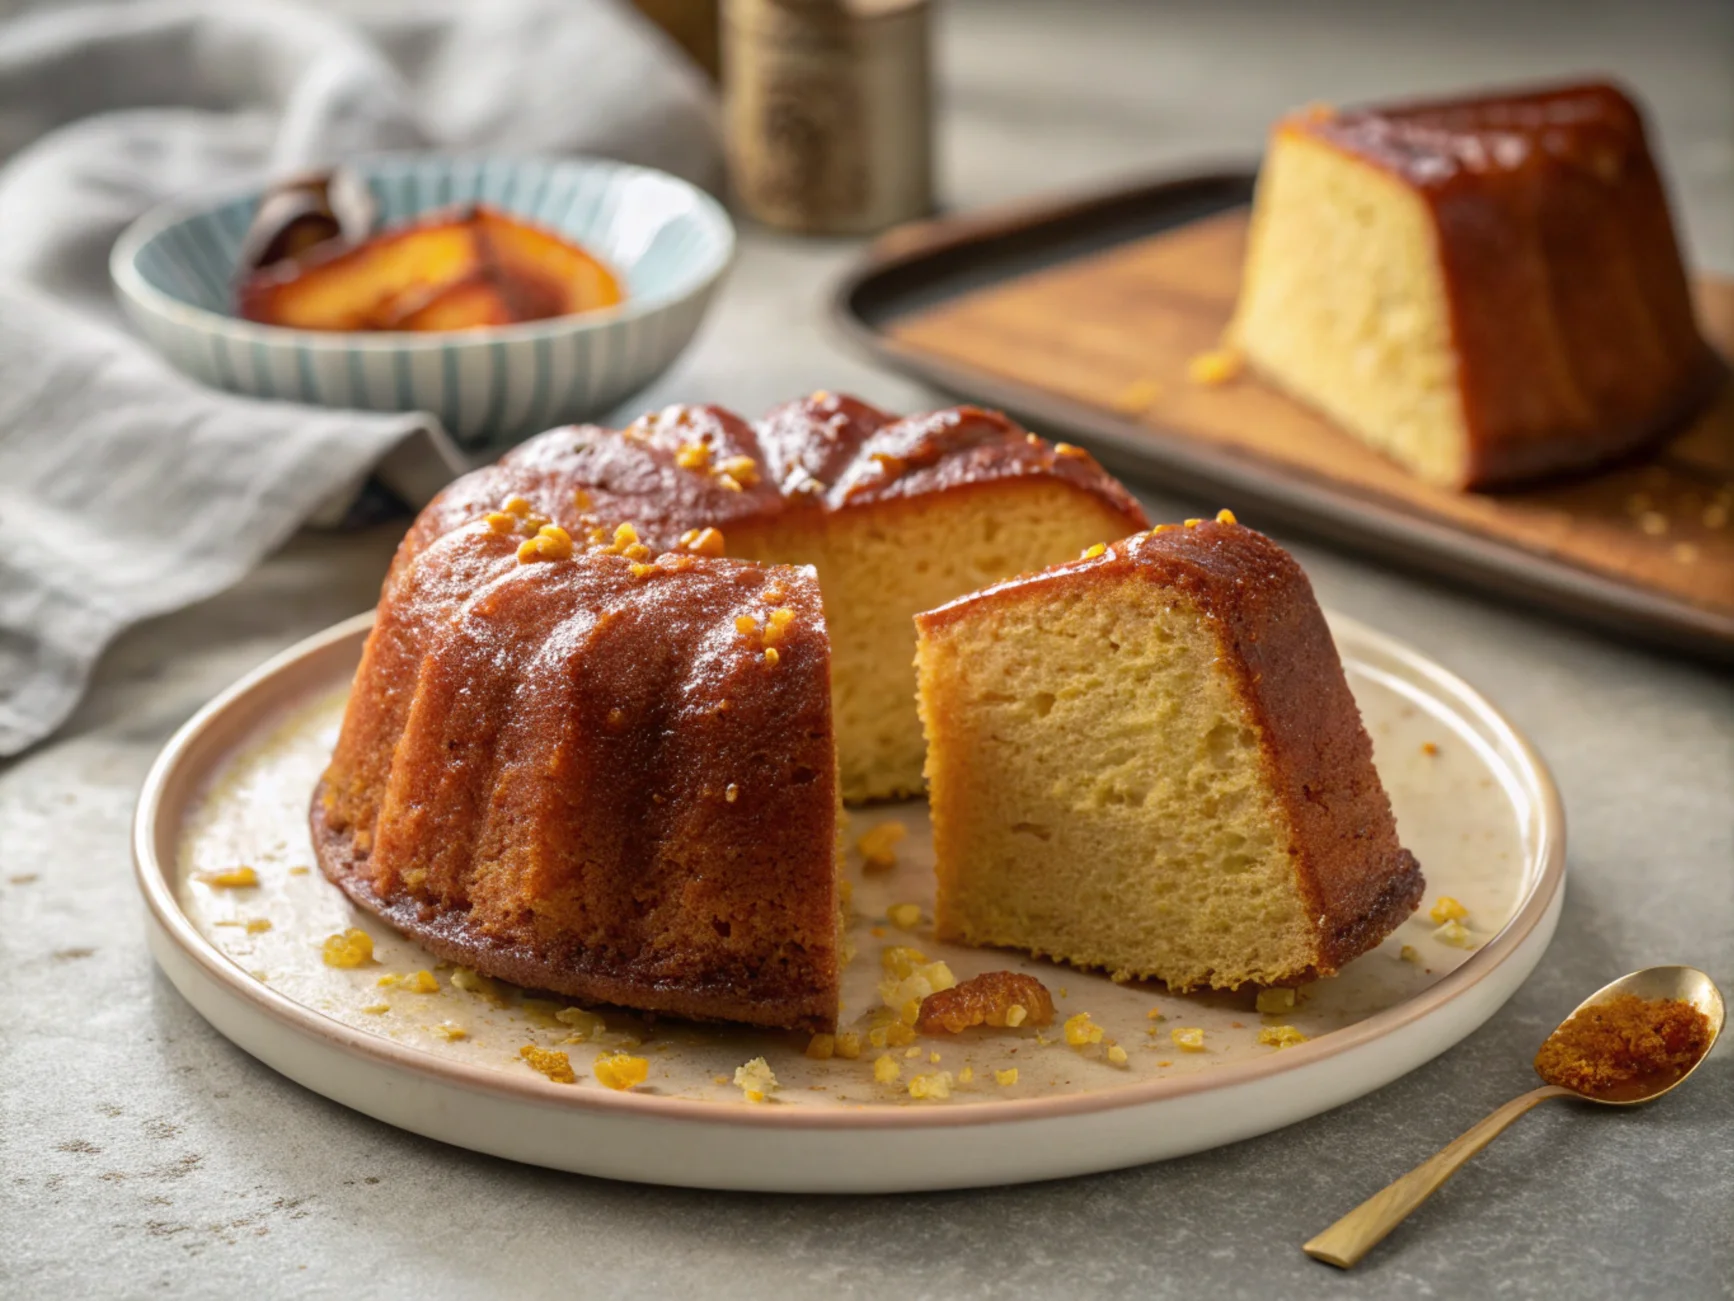
Traveling often calls for snacks that are convenient, mess-free, and irresistibly tasty. Enter the travel cake—a dessert crafted specifically to meet the demands of life on the go. Renowned for its sturdiness, this cake is an ideal companion for road trips, picnics, hikes, or even as a heartfelt gift. Its dense texture not only helps it stay fresh for longer but also minimizes crumbling, making it a practical and delightful treat for any adventure.
In this guide, we’ll explore the art of creating the perfect travel cake. From assembling the right ingredients to baking and storing it for long-lasting freshness, this article covers all the steps and tips you need. Whether you’re a seasoned baker or a beginner, this detailed step-by-step guide will undoubtedly ensure success. So, let’s dive in without delay!
Table of contents
How to Make a Travel Cake Step-by-Step
Making a travel cake involves a blend of simple ingredients, easy techniques, and a little patience. Below is a comprehensive guide to help you craft this versatile dessert, along with tips for ensuring your cake stays moist and flavorful during your journey.
Ingredients for Travel Cake
To make a classic travel cake, you’ll need the following ingredients. This recipe yields a medium-sized loaf that serves 6-8 people.
- All-purpose flour: 2 cups (250g)
- Baking powder: 1 teaspoon
- Salt: 1/2 teaspoon
- Unsalted butter: 1/2 cup (115g), softened
- Granulated sugar: 3/4 cup (150g)
- Eggs: 3 large
- Milk: 1/2 cup (120ml)
- Vanilla extract: 1 teaspoon
- Optional Add-ins:
- Chocolate chips: 1/2 cup
- Dried fruits (e.g., cranberries, raisins): 1/3 cup
- Nuts (e.g., almonds, walnuts): 1/3 cup
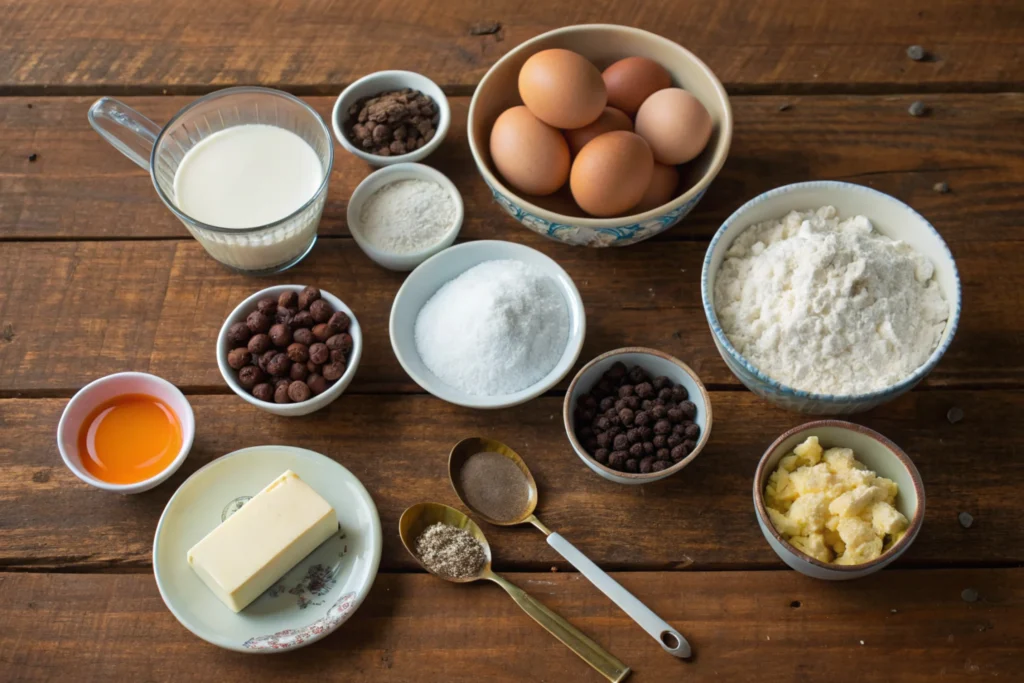
These ingredients provide the foundation for a cake that is flavorful, moist, and easy to customize. Optional add-ins can transform the cake to suit your taste preferences or occasion.
Preparation Steps for Your Travel Cake
Once you’ve gathered your ingredients, follow these steps to prepare the perfect travel cake:
1. Prepare the Equipment
- First, preheat your oven to 350°F (175°C). While it’s heating up, grease a loaf pan and line it with parchment paper. This step makes sure your cake won’t stick and makes it super easy to lift out once it’s done baking!
2. Mix the Dry Ingredients
- In a medium-sized bowl, combine the all-purpose flour, baking powder, and salt by whisking them together. Set this dry mixture aside to use later in the recipe.
3. Cream the Butter and Sugar
- In a big mixing bowl, grab your hand or stand mixer and cream together the softened butter and sugar. Beat it for about 3–4 minutes until it’s nice and fluffy. This step might feel a little extra, but trust me, it’s the secret to getting that perfectly tender cake texture!
4. Add the Eggs
- Add the eggs to the mixture one at a time, beating thoroughly after each addition. This step ensures the ingredients are well-emulsified, which helps maintain the cake’s structure and prevents it from sinking during baking.
5. Combine Wet and Dry Ingredients
- Gradually add the dry ingredients to the butter mixture, alternating with the milk. Start and end with the dry ingredients to maintain the right batter consistency. Mix just until combined to avoid overworking the gluten.
6. Incorporate Flavorings and Add-ins
- Mix in the vanilla extract along with any optional add-ins, such as chocolate chips, dried fruits, or nuts. These additions enhance the cake with extra texture and flavorful surprises in every bite.
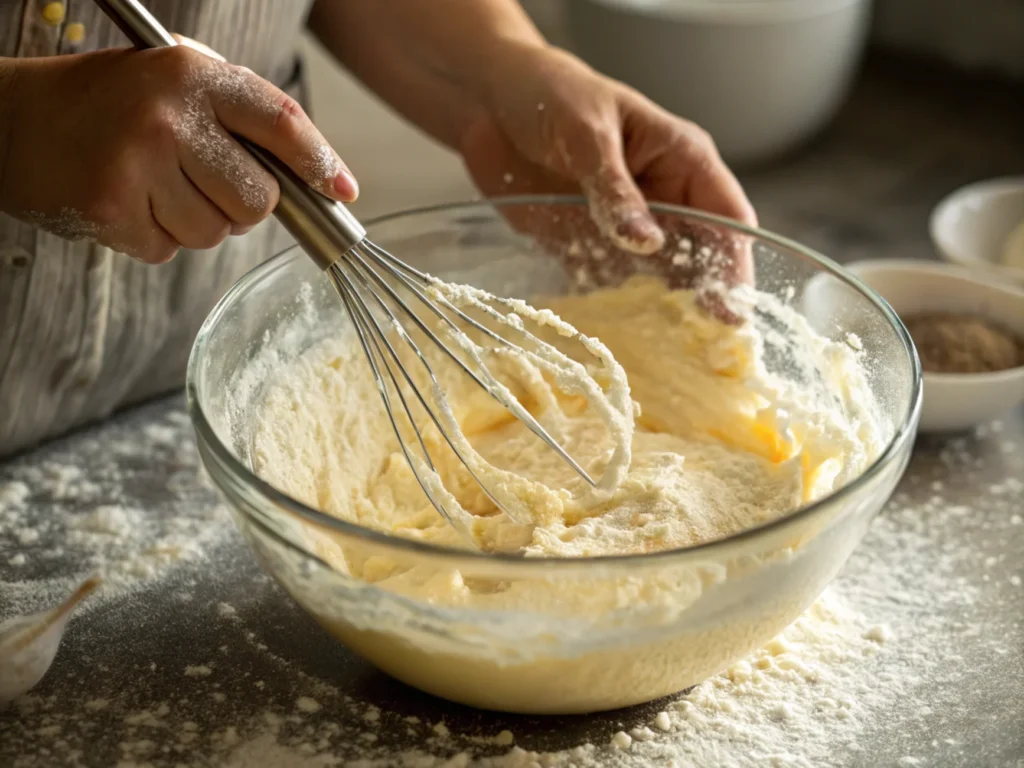
These steps ensure your batter is smooth, well-balanced, and ready for baking.
Cooking Instructions for a Delicious Travel Cake
1. Pour the Batter
- To begin with, transfer the batter into your prepared loaf pan. Then, use a spatula to spread it evenly and smooth the top so that it bakes uniformly. This step, though simple, is significantly important for achieving a consistent texture and appearance.
2. Bake the Cake
- Pop the loaf pan into your preheated oven and bake for 45–50 minutes. Halfway through, give the pan a little turn to make sure it bakes evenly. You’ll know it’s done when you poke a toothpick into the center and it comes out clean or with just a couple of crumbs.
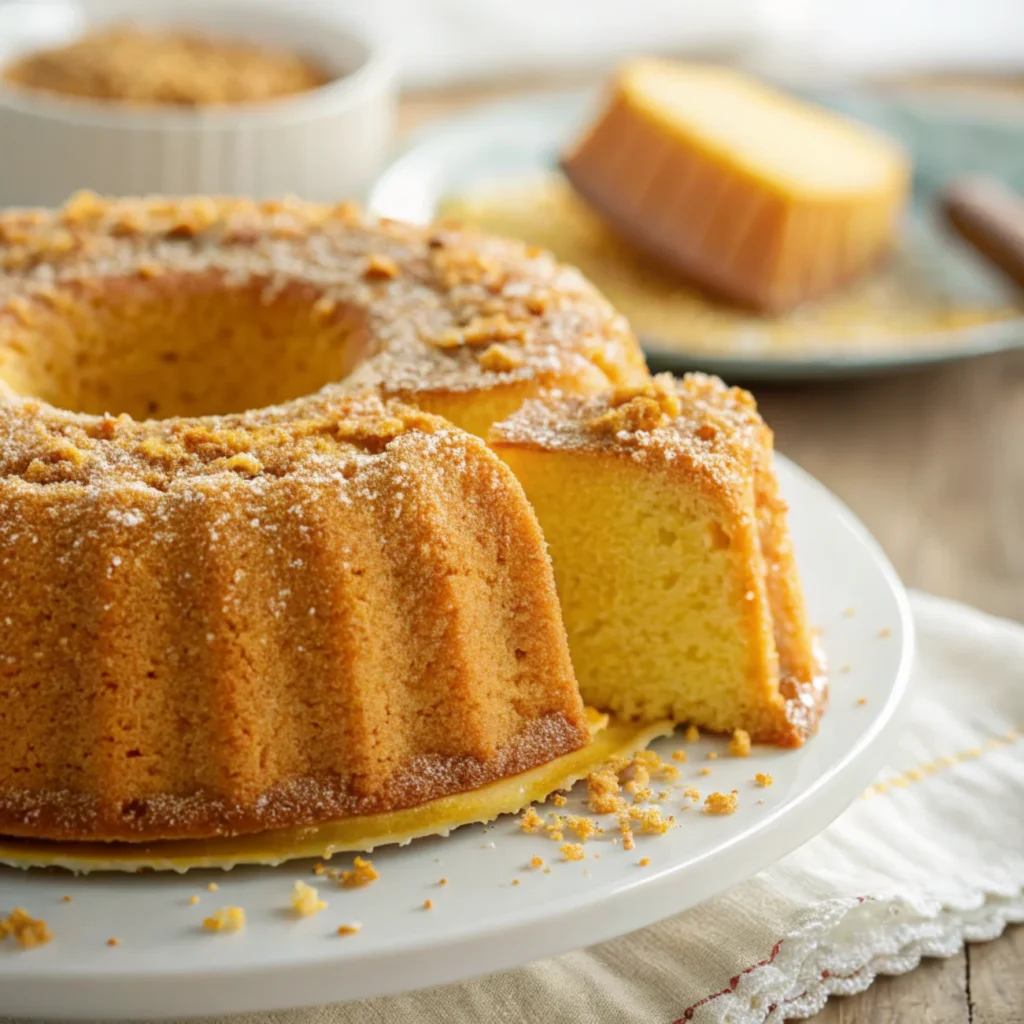
3. Cool Completely
- Remove the cake from the oven and let it cool in the pan for about 10 minutes. Then, transfer it to a wire rack to cool completely. This step prevents the cake from becoming soggy as it cools.
4. Store Properly
- Start by wrapping your cooled cake in parchment paper or plastic wrap, then place it in an airtight container. This keeps it fresh for up to 5 days at room temp—or even longer if you pop it in the fridge. Plus, storing it this way helps lock in the flavors and keeps the texture nice and moist!
Why Travel Cakes Are Perfect for Any Journey
Travel cakes are, without a doubt, not just about taste; they’re a practical solution for modern lifestyles. Specifically, their dense texture prevents crumbling, therefore making them easy to slice and pack without creating a mess. Additionally, their ingredients are explicitly designed to retain moisture, ensuring you can enjoy a fresh, flavorful dessert days after baking. Indeed, they combine convenience and deliciousness perfectly!
Looking for more creative dessert ideas? Try the Hawaiian Banana Bread Recipe – A Tropical Twist, a tropical variation perfect for summer outings.
Pro Tips for Baking Success
Mastering the art of the travel cake takes practice, but these tips will help ensure you get it right every time:
- Use Fresh Ingredients: Baking powder and flour that are past their prime can affect the cake’s texture and rise. Always check expiration dates.
- Don’t Overmix: Overmixing the batter can lead to a dense, rubbery cake. Mix just until the ingredients are combined.
- Choose the Right Add-ins: Avoid add-ins that release too much moisture, such as fresh fruits, as they can make the cake soggy.
- Cool Completely Before Storing: Proper cooling prevents condensation, which could make the cake soggy and affect its texture.
With these tips in mind, your travel cake will be the highlight of your next adventure!
Cooking Process
Now that the batter is ready and the pan is prepared, it’s time to bake your travel cake to perfection. Here’s how to complete the cooking process:
- Check for Doneness Early
- About 10 minutes before the estimated baking time is up, start checking the cake for doneness. Insert a toothpick or skewer into the center of the cake. If it comes out clean or with a few dry crumbs, the cake is ready. Avoid overbaking, as this can lead to a dry texture.
- Cool the Cake Properly
- After the cake is fully baked, take it out of the oven and let it rest in the pan for about 10 minutes. This resting period allows the structure to stabilize. Then, carefully transfer the cake to a wire rack to cool completely. Proper cooling is essential to help the cake maintain its shape and prevent crumbling during transport.
- Final Touches
- If desired, glaze the top with a simple sugar syrup or a light icing for extra flavor and moisture retention. Sprinkle chopped nuts or dried fruits as garnish for added texture.

Finishing Touches and Serving Suggestions
When your travel cake is fully cooled, it’s time to prepare it for the journey. Here’s how to finish and serve it:
Cut into Slices or Portions
To make transport and serving more convenient, slice the cake into evenly sized portions. Use a serrated knife for clean, precise cuts and to minimize crumbling.
Wrap for Travel
To keep each slice fresh and easy to grab, wrap them up one by one in parchment or wax paper. Once they’re all snug, pop them into an airtight container. That way, they stay nice and fresh, and you can just grab a slice when you’re in a hurry!
Serve with Complements
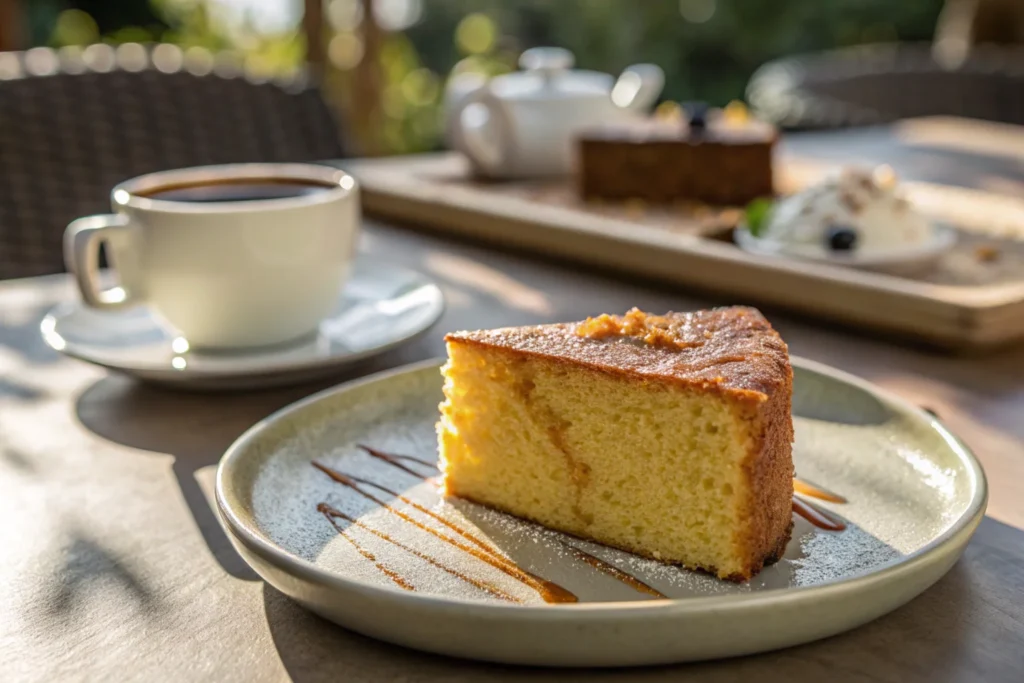
Pair your travel cake with a hot cup of coffee or tea. It also pairs well with a side of fresh fruit for a balanced treat.
For more creative dessert recipes, explore the Birthday Cakes Guide for tips on creating celebratory treats perfect for any occasion.
Pro Tips & Variations
Travel cakes are remarkably versatile and undoubtedly easy to customize. Below, you’ll find some advanced tips and creative variations specifically designed to take your baking to the next level. Moreover, these ideas will surely inspire you to experiment and elevate your skills!
Advanced Baking Tips
- Achieve Perfect Moisture
- Add a tablespoon of sour cream or yogurt to the batter for extra moisture. This trick ensures the cake stays soft even after a couple of days.
- Boost Flavor with Spices
- Enhance your cake with ground cinnamon, nutmeg, or cardamom. These spices add warmth and depth, perfect for seasonal variations.
- Experiment with Extracts
- Beyond vanilla, try almond, lemon, or coconut extract for unique flavor profiles.
Creative Variations
Citrus Infusion
Add grated lemon or orange zest to the batter for a bright, tangy flavor. Drizzle with a citrus glaze for an extra punch.
Chocolate Lovers’ Delight
Mix in dark chocolate chunks and a teaspoon of instant coffee powder. This combination creates a rich, mocha-flavored treat.
Gluten-Free Version
Swap out the all-purpose flour for a good gluten-free baking blend, and toss in an extra egg. That extra egg will help with structure and binding, so your cake stays together perfectly!
For a unique twist on classic recipes, check out the Kefir Sheet Cake, a moist and tangy dessert perfect for family gatherings or special events.
Benefits of Travel Cakes
Travel cakes are more than just a delicious treat; they’re practical and adaptable to various needs. Here are some key benefits:
- Durability
- Unlike frosted or layered cakes, travel cakes are sturdy and less prone to damage during transportation.
- Long Shelf Life
- Properly wrapped, they remain fresh for up to a week, making them ideal for extended trips.
- Customizable
- With endless flavor and ingredient combinations, they cater to diverse tastes and dietary needs.
- Portability
- Their compact size and crumb-resistant nature make them perfect for picnics, hikes, and road trips.
FAQs About Travel Cakes
Why is it called a travel cake?
Travel cakes get their name from their durability and portability, making them ideal for carrying during journeys without fear of spoilage or crumbling.
What is the difference between a travel cake and a normal cake?
The main difference lies in structure and design. Travel cakes are denser, making them less likely to crumble. They also avoid heavy frostings or fillings, which can spoil or cause messes.
How do you keep a cake fresh while traveling?
Securely wrap the cake in parchment paper or plastic wrap to preserve its moisture and texture. Then, store it in an airtight container. For extended trips, refrigerate or freeze the cake to keep it fresh and ensure it maintains its quality.
What is Journey Cake made of?
Journey cake, another term for travel cake, often consists of basic pantry ingredients like flour, sugar, butter, eggs, and milk. It may include add-ins like dried fruits or nuts for extra flavor.
What packaging works best for travel cakes?
Grab some parchment paper or wax paper and wrap up each slice on its own. Then, tuck them all into an airtight container. It’ll keep them from drying out and make it super easy to grab and serve when you need them!
Can travel cakes be frozen for longer storage?
Absolutely! Travel cakes freeze like a dream. Just wrap them up nice and snug in plastic wrap, then pop them into a freezer-safe bag or container. When you’re ready to enjoy, just let them thaw at room temp, and you’re good to go!
How do you make gluten-free travel cakes?
To begin with, substitute all-purpose flour with a gluten-free blend. Furthermore, to improve the texture, add an extra egg or alternatively a teaspoon of xanthan gum. This way, your cake will maintain its structure and flavor while being gluten-free. In addition, these adjustments ensure a moist and cohesive final product.
Conclusion
Travel cakes are, indeed, a delightful blend of practicality and flavor. Whether you’re embarking on a road trip, hosting a picnic, or even preparing a make-ahead snack, this versatile dessert surely has you covered. Moreover, from their durability to their endless flavor possibilities, travel cakes are unquestionably the ultimate companion for any journey.
With this in mind, the tips, recipes, and variations shared in this guide will help you create a travel cake that suits your needs and tastes. So, gather your ingredients, start baking, and eventually enjoy the adventure with your perfect portable treat!
7 thoughts on “Travel Cake: The Perfect Dessert for On-the-Go Adventures”